How To Sew A Summer Hat is an easy sewing tutorial beginners and more advanced sewers will love to make in time for the Summer.
Sunny Summer days will be here soon, and as a sewer you might want to make not one but a few Summer hats in time to protect yourself and your family from the sun and with it be able to enjoy the good weather and spend most of the time outdoors.
Sewing a Summer hat might be a sewing project you might have on your sewing list, we are sure you will love to make this easy to sew Summer hat as the pattern will help you to make a pretty hat everyone will love to have!
Sew A Summer Hat
Materials and Supplies
- 4 pieces of cotton medium to heavyweight fabric
- 4 pieces of light to medium weight fabric for the lining
- 4 pieces of lightweight interfacing (optional)
- Thread
- Pencil
- Scissors
- Pins
- Sewing machine
- Iron
- Summer Hat FREE Pattern
Related: 10 Must Have Sewing Tools
Note: I will recommend making a sample of the hat on paper or with a cheap fabric to try it on before you cut your fabric, making a sample first will allow you to make any corrections on the pattern to make the perfect hat for you.
How To Sew A Summer Hat Step By Step
Step 1 – Cut Out All Your Fabric Pieces For The Summer Hat
Prewash and iron all the fabric before, on this tutorial I will not use any lining as the fabric I’m using on this tutorial is a heavyweight, in case you use the interfacing press it to the lining pieces.
Download the Summer Hat FREE pattern, print it out and cut out.
Fold your fabric in 4, lay over the folded fabric the pattern, pin it to the fabric and cut out the four pieces adding 1/4 inch for the seam, follow the same steps to cut out the four pieces for the lining.

Step 2 – Stitch On 4 Pieces
As this pattern is designed with the cap and the rim together, the steps to follow are easy to work on them and the same steps will be for the hat fabric and for the lining, so you can work on both pieces at the same time.
Match the fabric by pairs, two pairs for the hat and two pairs for the lining, right side to right side, pin each pair and stitch on one side. Open the seams and press.

Step 3 – Sew On The Hat
Open each piece and match it to the other half hat, right side to right side, match the seams, pin each piece and stitch on all the way. Open seams and press.
Leave a 1 1/2 opening on one side of the lining, this opening will be used to turn out the hat later.

Step 4 – Top Stitching All Seams
Top stitching all seams both sides.
Top stitching on both sides of the opening on the lining too.
On the image below, you can take a look how the top stitching looks on the wrong side of the hat, both pieces are worked the same, the hat and the lining.

On the image below, you can take a look how the top stitching looks like on the right side.

Step 5 – Stitch On The Hat
The hat should have the wrong side out and the lining should have the right side out, tuck in the lining into the hat, match all the seams on both pieces and pin the hat rim all around.

Step 6 – Stitch On The Rim
Stitch on all around the rim, make little cuts all around the rim seam.
Turn out the hat by the opening, and push out the rim seam with the help of a rounded point pair of scissors, press the rim.
Stitch to close the opening by hand.

Step 7 – Top Stitch The Hat Rim
Top Stitch the hat rim 3/8 inch, five times.

The Summer Hat is ready and it looks amazing!

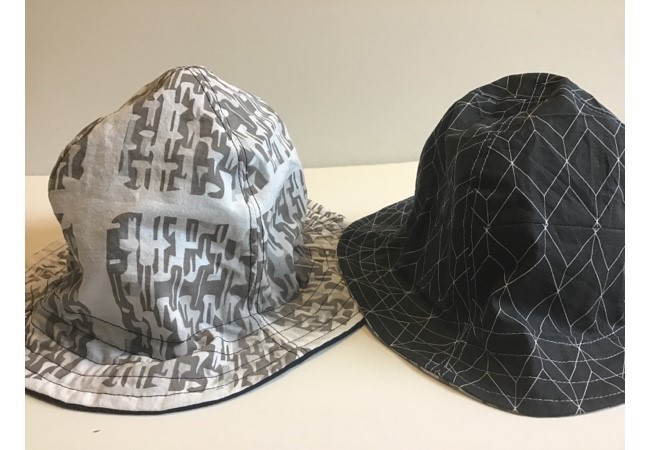
On the image below, you can take a look to the hat on the inside and it looks perfect to, this makes the hat a reversible hat, all you need to do is to find a pretty fabric for the lining and you can use the hat either way.

We hope you like the Summer Hat Tutorial and you make a few of them, for yourself and for your family and friends.

What Is The Best Fabric To Sew A Summer Hat?
Any fabric will work good to make this hat, from a lightweight fabric like cotton, linen or to heavyweight fabrics like wool, canvas or denim.
When using a lightweight fabric you can use a light or medium weight interfacing fabric, and when you use a heavyweight fabric you can make the hat with no interfacing fabric and a lightweight fabric for the lining.
How To Wash The Summer Hat?
You can wash the Summer hat in the washing machine with other clothing or with similar fabrics, if you’re afraid of your fabric might bleed, wash the hat by hand first separately.
If the hat is made of wool or other delicate fabric like silk, follow the washing instructions for the fabric.
Is The Sew A Summer Hat Tutorial Good For A Beginner?
Yes, this is an easy sewing project to make that any beginner can make, if you are a beginner I will recommend basting the pieces before stitching on your sewing machine, basting all the pieces will help you to work on the sewing machine with more confidence at the beginning.
What Is The Best Sewing Machine To Sew A Summer Hat?
Any sewing machine you have at home will be good for this tutorial, in case you’re planning to make more than one Summer hat for your family and friends or as a home based sewing business, I will recommend you to get a better sewing machine with high speed like the Juki TL-2000 QI Sewing Quilting Machine as this machine can handle well any type of fabric (light and heavyweight) and this sewing tutorial is made with straight stitching only.
If you’re looking for a sewing machine to sew different projects without the need to break the bank, I will recommend you to take a look to this sewing machine (affiliate)
Sew A Summer Hat Closing Thoughs
We hope you like the sewing tutorial to see a Summer hat, and make not one but many of them, as Summer will be here soon and we know you like to make your own clothing for yourself and for your family too.
This is an easy sewing tutorial beginners and more advanced sewers will love to make, all you need is to find a pretty fabric to make it.
If you like the Reversible Summer Hat Tutorial, share out Pin on your Social Media, so your friends can find it also and make their own!
Happy Sewing
Thanks so much for sharing our Pin on your Social Media!

Get more sewing tutorials beginners and more advanced sewers will love to make!
- DIY Children’s Apron – An easy apron to sew for the young chef at home!


Thank you for this fantastic article. I really enjoyed it. I love hats, and as a former circumnavigation, we lived on the sea for 10 years. I know the importance of a summer hat. I can’t live without it. The step-by-step tutorial is great and easy. I like to thank you again, I’ll dust off my sewing machine right away, and gonna sew my first summer hat. Great.