Tie-up fabric basket tutorial is an easy step by step guide to follow that will help you to start sewing pretty things.
If you love to sew and you love to bring something handmade by you as a gift when you’re invited to a party or to visit a friend, making this fabric basket won’t take you long and everybody will love it!
You can read The Best Sewing Machines For Beginners here!
Materials required to make the Tie-up fabric basket tutorial
 Cotton fabric of two contrasting colors:
5 squares of 3 1/2 x 3 1/2″ of one color
4 squares of 3 1/2 x 3 1/2″ of the second color
1 piece of thin batting fabric of 10 x 10″
1 piece of cotton fabric of 10 x 10″
4 pieces of satin ribbon of 20″ long each piece
Equipment required:
Sewing machine
Patchwork ruler
Rotary cutter
Cutting Mat
Scissors
Pins
Tie-up fabric basket tutorial step by step tutorial
1. Press the two cotton fabrics before cutting the squares with your patchwork ruler and the rotary cutter. If there’s any fold on the pieces of fabric, press again.

2. This picture is to show you all the squares of fabric you’ll need, 5 from one fabric and 4 from fabric B

3. You’ll be making the Nine-patch square (patchwork), you need to display the squares of fabric following the layout I’m sharing here.

4. As most of the patchwork blocks are made by sewing lines of pieces, the first step to work is to pin the squares on the next one on each line, to make the Nine-patch block you have three lines. You can take a look on the picture below, how I pinched the pins on the squares of fabric on each line. Sew on each line on your sewing machine.

5. As you sew on each line, remove the pins from each line, press.
The three lines should look this way after pressing.

6. On this picture below, I want to show you how the seams look like after pressing, both seams to one side.
The two strips, top and bottom, seams should be pressed pointing out on the strip, on the center strip, press the seams pointing to the center of the strip.
By pressing this way, it will be easier to sew the strip to each one, and it will help you to get better results.
Pinch a few pins on each line.
Strip # 1 to strip #2 and strip # 2 to strip # 3, sew on

7. Remove the pins from the strips and open the strips, press and your nine-patch block should look like the picture below

8. It’s time to make the quilting sandwich.
Lay the batting fabric on your work table, lay over it the piece of fabric for the back of the basket, right side up.

9. Lay one piece of satin ribbon on each corner of the fabric.

10. Lay the nine-patch block (right side facing down) on top of the quilting sandwich and pinch one pin on each corner, be sure the pin is pinching the satin ribbon.

11. Sew on all around the edge of the nine-patch block (seam of 1/4″)
Don’t forget to leave 2″ open on one side of the block. In the middle.

12. With the help of your scissors trim the for sides and trim each corner diagonally.
Note: don’t trim the satin ribbons. Turn the piece out.

13. Pinch a few pins and sew on around the edge with your sewing machine

14. Now, it’s time to sew on the ditch, follow the lines of the nine-patch block, it will make easier to work this way.

15. The basket will look like this.

16. This is how the basket looks like when you see the back.

17. With the help of the patchwork ruler and a pencil, trace a diagonal line on each corner squares.

18. Sew on and trim the threads.

19. It’s time to make the ties, two satin ribbons at the time.

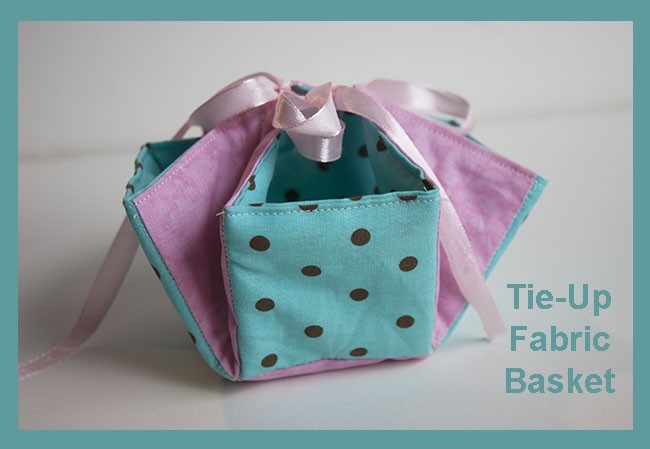
20. Your basket might look like this when you tie the four satin ribbon, don’t panic, you need to work with your hands to form the basket.

21. Voila, it looks much better now!

Well done, your fabric basket look amazing!
I hope you liked this sewing tutorial for beginners, now you’re doing better and you might feel more confident to sew more on your sewing machine.
It might look like you need to follow so many steps to make the tie-up fabric basket, but each step is easy to work on.
All the seams are straight and that makes this tutorial perfect for any beginner. Now you have in your hand a beautiful basket made by yourself!
You also did a Nine-patch block and it’s the beginning of many patchwork blocks you’ll be making!
Sewing and making patchwork will help you to make many pretty things!
You can read here another sewing tutorial for beginners!
Enjoyed this sewing tutorial? Give my Pin a share!
