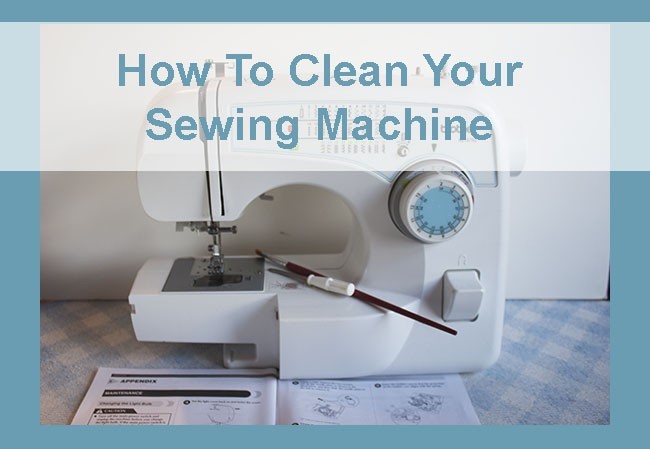
When you decided to buy you’re sewing machine, you took the time to know which was the best one for you, you also decided to make an investment on it, and you enjoy the time you spend working on it.
Your sewing machine is important for you and it will work better every time you use it when you learn how to clean and maintain it, this is why it’s important to know How To Clean Your Sewing Machine – Beginners Guide.
When It comes to cleaning you’re sewing machine, how often depends on how much you use it, and the type of fabric you sew, Usually once a month is recommended.
How To Clean You’re Sewing Machine, Easy Steps To Follow
This article may contains some affiliate links, I thank you for making your purchases on Amazon using them, this way you help me to support my small family business.
Read You’re Sewing Machine Manual
Most of the sewing machines have the same parts, but it’s always important to take the time to read its manual and read the steps every brand recommends for every particular sewing machine cleaning at home.
By doing this you’ll get a good idea of the steps you need to follow, in general the steps to follow are these:
Preparation.
First thing to do is make sure your machine is unplugged, then you will have to remove the needle and the needle plate.
On some machines the plate will just slide out, while others you will need a screw driver for this, also a good idea to look at the manual that came with the machine to see what works for your model of sewing machine.
You will need a nylon brush, and tweezers and do not use compressed air to blow things out, as the dust will only go further into the machine.
Cleaning
Once you get the cover off, you will probably see dirt bunnies in there that have made you’re sewing machine their home.
This is the time to use the nylon brush and tweezers to get them out of there.
On some machines where the bobbin sits, it also can be removed for cleaning, but is best to check the sewing manual for the machine because it might only fit back in the one way, or even take a photo with your camera before removing.
A vacuum can also be used as long as it is not too strong a suction.
Lubricate
After your machine is as clean as you can get it, then before putting back the slide plate and needle plate, check your manual for where it needs to be oiled, as some will need oiling.
Always use a recommended oil for sewing machines, and its often recommended to use only one drop where ever oiling is needed.
Once finished oiling install your slide plate and needle plate, and give the machine a good wipe down to remove any dust.
It’s also a good idea to use a new needle before starting to sew again.
Many machines recommend a new needle after every 4 to 6 hours of sewing.
And always use a good quality thread when sewing and you will find you’re sewing machine will run like it was new after a good cleaning.

Keep A Record of the Sewing Machine Maintenance
A good idea will be if you take the time to write down the date of the last time you did the cleaning on you’re sewing machine and write down if you did anything extra as a maintenance or if you took it to the technician, by doing this you’ll get to know better how is you’re sewing machine doing and what type of cleaning you need to do and if it will need a major cleaning or maintenance service.
Keeping a record of the cleanings you do on you’re sewing machine, and this will help you to know it better, and to prevent any malfunction in the future.
How Often Should You Clean You’re Sewing Machine?
A good answer to this question could be that you need to clean you’re sewing machine at least once a year, but to keep it in better shape the need to make a cleaning should go on how often you use it and how long you use it.
The more you use it the often you need to spend a few minutes to do a cleaning, once per month or even every two times you use it.
Cleaning you’re sewing machine will depend also on what type of material or fabric you use, there are some fabrics that will make a lot of dust on you’re sewing machine as you work with them, in those cases the cleaning should be as often as it’s needed.
Do You Need To Clean The Outside Of You’re Sewing Machine Too?
The answer is yes, by doing it you protect more you’re Sewing Machines life, it will give protection from the dust and it will be in better shape every time you use it.
You can wipe the sewing machine with a cloth for dusting after every time you use it and cover it with a cloth.
What to Do After You Did the Cleaning On You’re Sewing Machine
Before you start working on your next sewing project, take the time to try the sewing machine first on a piece of fabric you won’t use for any important project, make you’re sewing machine run a few times and try to stop it on the middle of the fabric and start running it again.
This is an important step you need to do after you do a cleaning to know if the sewing machine set up was correctly done.
After oiling you’re sewing machine, it might be some oil drops on the sewing machine parts and they will drop on the thread and on the fabric as you start to work on it again. In case, you don’t try it before you work on your next sewing project, oil drops can get on the sewing project fabric and it can be ruined.
If you did the try out of the sewing machine after the cleaning and the oiling, and you don’t see any oil marks on the fabric after a few runs on a piece of fabric, you’re sewing machine is in good shape to start working on your next sewing project. 
Closing Thoughts.
As you work on different sewing projects, you’ll get to know more about you’re sewing machine, you’ll know when its time to make another cleaning and when it’s time to do the next oiling.
Anytime you’re sewing machine starts to make any strange noise, stop and check the threading, most of the times a sewing machine start to fail if the threading is not properly done, but if you’re sewing machine continues doing strange noises or not sewing right, it will be time to call to someone to take a look at it.
At the time of working on any sewing project you might want to have the best lighting on your sewing table, take a look to these lights to add to your sewing machine.
Keeping you’re sewing machine in good shape will help you to sew better and you’re sewing machine last longer in time.
Find this article helpful? Give my PIN a Share!!


Though I am just getting started with sewing and all, it actually look interesting enough that I clean my machine by myself. I was considering taking it to a servicing agent. However, seeing this post, I will have to go by all you have shared and hopefully, I will be able to make it work out for me. Thumbs up to you for sharing this helpful guide
Hi Rodarrick
Thanks for stopping today to read my blog, yes many times a good cleaning on your sewing machine will keep it in good shape and you can save the visit to the servicing agent, unless there’s something wrong with it, most of the time a good cleaning can be done at home.
Let me say I really know very little about seeing machines and it’s been a while I had access to one. I believe every machines needs to be taken care of properly and form time to time in order to ensure its wellbeing and longetivity. I’m aware of lubrication, almost every machines uses that essentially. I’ve learned a lot from this interesting article, thanks.
Hi there everyone 🙂 This is a great way to clean your sewing machine and if you have a sewing light (as mentioned in a post I read here) that will be super helpful. Its always nice to be able to see what you are doing.
One other toll I find useful (for the tight spaces) is a can of air. A few sprays and the little dust particles you can’t reach with tweezers or a brush will be gone.
You mentioned how often a person should clean their machine and I agree that it does depend. I made a comfy blanket one time for my son and it was so fuzzy that the edges would shed and my machine looked like it ate a feather duster or something 😂 Needless to say, after one project it needed a good cleaning. On the other hand, 20 jean repairs and multiple hems and patches later and it still looks tidy and clean!
Love your website! 🙂
I could remember then, I was so young and my mum had a sewing machine she used to mend her clothes and also make some simple styles for me and my siblings, I got so familiar with sewing machine since then and I can tell that it’s very good to clean the machine continually in order to avoid rust and all. My wife and I thought of bringing one from my mum’s, now I can service I myself with the help of this information. Thanks for sharing.
Hi,
Thanks for reading my article today, I’m glad you found it helpful, when bringing your home your mums’s sewing machine will be a good idea to do a cleaning and check up the machine before working with it.
Try it with no power first and it the machine works with ease, then you can plug it and try it. If your mom has been working with it lately, you don’t need to do this step.
It’s always a good idea to have a sewing machine at home.