Seam Guides To Sew Straight Seams will give you ideas to what to use to get nice professional straight seams on all your projects!
Sewing is a creative activity and it will help you to create many different projects, but when you’re a beginner one of your biggest challenges will be to get accurate straight seams. This will come with practice, the more you work on easy projects, they will help you to gain better skills to work on any project.
 But when you want to work on your first projects like a pro, you might get frustrated that controlling your project as you sew on is not as simple as it seems to be for those YouTube videos sewers around the world share, so, why some sewers can sew straight seams and not you? Once again, it takes time and practice, but there are a few things you can use that will help you to get those professional straight seams every time you work on a new project, and most of them you already have at home!
Seam Guides To Sew Straight Seams
Why It Is Important To Sew Straight Seams
Whether you’re a beginner or more experienced sewer, you might know the success of working on any project is how accurate are all your seams, as you gain practice sewing, you will master the art of making any seam right without the need of any help.
But if you’re a beginner and you like to sew the right way and get all your seams straight, you might need the help of any tool to help you to keep stitching straight seams, there are a few things you might have at home already, these are inexpensive tools and you might be surprised how well each one of them works!

Seam Guides #1 – Throat Plate
Every sewing machine has a throat plate that comes from the manufacturer with some seams marks to help sewers to keep accurate seams. If you’re new to sewing, it won’t take you long to take a look to the throat plate and check on the marks to know your machine better, on your next project it will help you as you sew to use the throat plate marks as a guide.
When you work on a project, you need to pay attention to the needle as you sew on, but as you get more experienced, you will get used to keep your vision wider and you will be able to control better the machine as you sew, your vision will get used to seeing wider and keep your eyes on the needle at the same time as you see the seam guide.
These guides on the throat plate are helpful but some times they are hard to see, below I will share some ideas of what you can use to help you to see better a seam guide and I’m sure you will find one that will work great for you.
Seam Guides #2 – Presser Feet
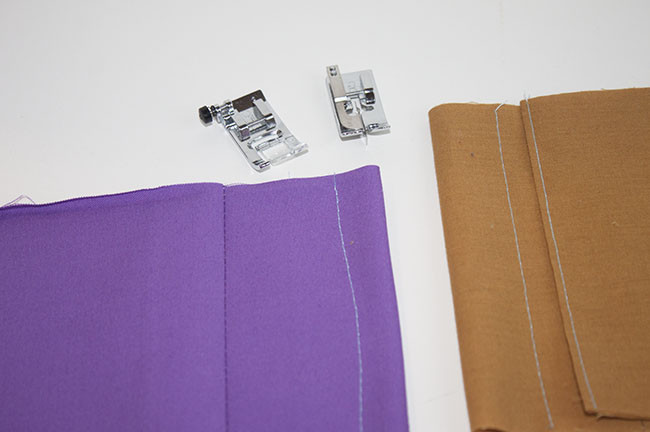
Every sewing machine comes with more than one presser feet, you can take a look at the presser feet for your machine and you might have more than one foot that can help you to sew straight seams.
Your machine might have the multipurpose foot and it can help you to sew narrow seams as wide as the foot is, your machine might have also the 1/4″ foot that will help you to keep those seams 1/4″, your machine might have also the stitch in the ditch foot that will help you to sew very narrow seams straight.
Seam Guides #3 – Magnetic Seam Guide
It’s easy to use, all you need to do is to measure with a measure tape the seam allowance you need on the plate of your machine and place the magnetic seam guide, it’s easy to see and it will help you to sew straight stitching to any allowance you need.
You might have the question about if is OK to use a magnet on your sewing machine, and the answer is yes it is, it won’t hurt your sewing machine, even if your machines is electronic or computerized. (my sewing machine is computerized and it works well anytime I use the magnetic seam guide)
You can take a look on Amazon to this Magnetic Seam Guide
Seam Guides #4 – Painter’s Tape – Easy to Remove And Adjust
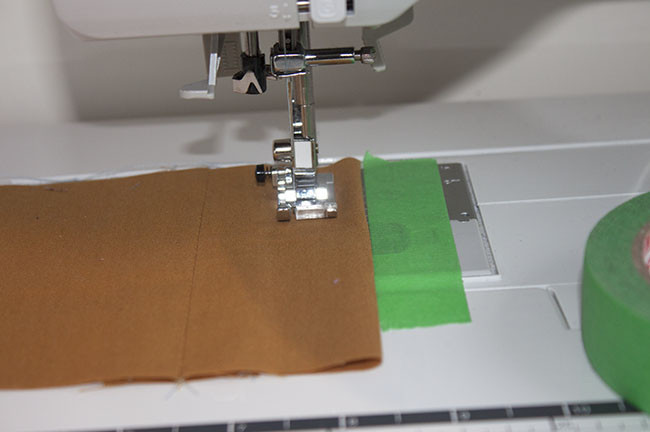
Nothing easier to help you to keep all those seams straight and accurate, just cut a piece of painters tape and stick it on your machine after you measure the seam you need with the help of a measure tape. If you find painter’s tape is to thin and it doesn’t help you much to get straight seams, you can cut a few pieces of tape and stick one piece over the first one, it will be thicker and it will help you more.
Note: never use duct tape or other tape that has strong stickiness, it can damage your machine and it will be hard to remove from it.

Seam Guides #5 – Sticky Notes
Use the whole block, not just one sticky note, it will give you a thick guide for your seams, it’s easy to remove and adjust and it will leave no sticky mark on your machine.
Seam Guides #6 – Rubber Bands
This is an expensive idea that can help you to mark a seam without leaving any sticky mark on your machine, it can move a little as you sew on, but with some practice it will work great!

Seam Guides #7 – Fridge Magnet
Next time someone gives you as a souvenir a fridge magnet, don’t put it on your fridge and keep it in your sewing tools basket, it will help you to keep those seams straight, it’s easy to place on the seam allowance you need and you can use it over and over anytime you need it.
Seam Guides #8 – Eraser
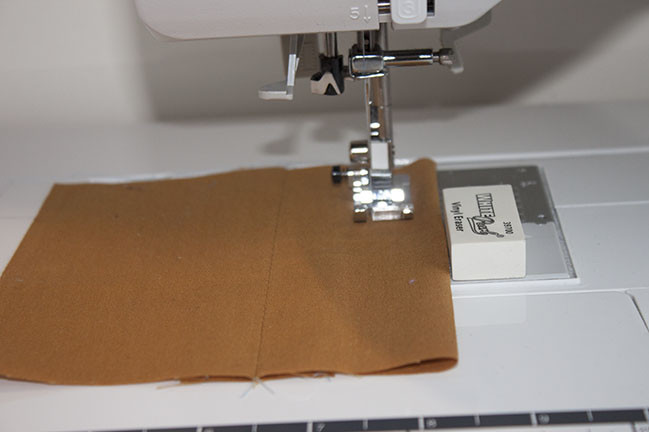
An easy way to get a good seam guide is to place a new eraser on your machine to help you to get those seams straight and it can be placed anywhere on your machine, the trick is to put some sticky tape on one side of the eraser, like the stickers for hanging a picture on the wall, easy to put on and to remove and it will leave no mark on your machine.
Seam Guides #9 – Lego
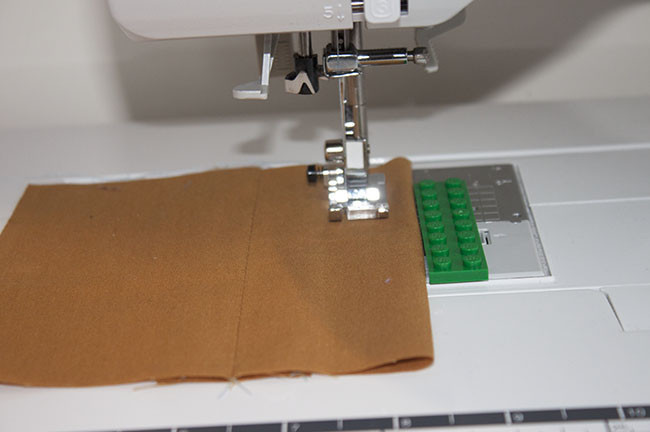
It could sound crazy, but you might have at home a kid who loves to play lego (legos are also great for adults) you can ask for a long lego piece borrowed and keep it in the sewing tools basket as it will help you to mark any seam you need to sew on your machine, the trick is simple as the eraser, just put some sticky tape for hanging pictures on the wall under the lego piece, it will help it to stay on its place as you sew on with your machine.
Seam Guides To Sew Straight Seams Closing Thoughts
 Sewing is so creative and as you keep working on different projects you will get skilled, but there’re times when you need to get accurate seams to get that professional finish on your project.
No matter if you’re a beginner or a more experienced sewer, keeping a seam straight is hard for many of us. Sewers around the world know well there are many tricks and hacks that help us to sew on any project better and get those professional finish on any project.
I hope you like these 9 seam guides ideas that I’m sure you might have them already at home and each one of them will help you to keep those seams straight.
If you have any other idea that can help more sewers, I would love to hear from you, leave a comment below.
Happy Sewing!
You can also read more sewing tutorials for beginners, that also some experienced sewers want to read:
- How To Finish A Seam For Beginners – Give your projects a professional finish by working on one of these method to finish a seam with your domestic sewing machine!
- How To Sew A Pencil Case – A step by step tutorial to sew a pencil case in less than 15 minutes!

To all the tailors out there, this is a very good and Wonderful thing to learn because seaming is really important and seaming straight is another important thing. My mum is a tailor and I know that she will find this post very priceless so I will make sure to share it with her as well.
Nice post
This is really an informative article, sewing is indeed a creative activity, it involve lots of creativity and designs and for beginners it will involve lots of practice, dedication and skill. This is a great skill that i will love to acquire especially now that am always at home during this pandemic lock-down, i know that many people especially women will love to learn this too, i will definitely share this article, and the guides is really awesome any beginner can get it right when the guides is diligently followed. Thanks for the post