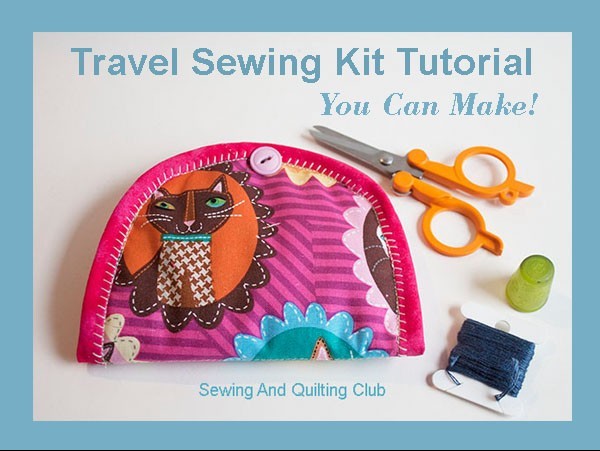
When you love to sew, you might want to be able to keep working on your sewing projects anywhere, a Travel Sewing Kit Tutorial will help you to make a small case where you can keep everything you need to keep working on it
Travel Sewing Kit Tutorial
Materials to make a travel sewing kit
2 pieces of cotton fabric any color 6 x 10″
1 pieces of cotton fabric 6 x 5″ (one of the pockets)
1 pieces of cotton fabric 5 x 5″ (second pocket)
1 pieces of thin batting fabric 6 x 10″ (to make the quilting sandwich)
1 pieces of cotton batting fabric 2 x 3″
1 pieces of bias 1 1/2 x 22″
1 snap fastener
1 button
Equipment
 Sewing machine
Scissors
Patchwork ruler
Rotary cutter
Cutting mat
Needle
Pins
Safety pins
Thread
Step by Step Tutorial to Make A Travel Sewing Kit
1. Cut all the fabric pieces
Using the patchwork ruler, the rotary cutter and the cutting mat, cut all the pieces of fabric you’ll need to make the sewing kit case.
2. Cut the fabric bias
Cut the fabric using the 45 degrees line on the patchwork ruler to cut the bias 1 3/4″ x
If you’re cutting the bias from a small pieces of fabric as I did, you can sew on the pieces on your sewing machine to make a long bias. Open the seams on the bias and press.

3. Sew on the fold on the two pieces of fabric to make the pockets.
On the two pieces of fabric to make the pockets, fold twice one of the long sides and sew on, press.

4. Sew the two pockets together.
Lay the small pocket on the larger and sew on the smallest on the middle

5. Sew on the batting fabric on the inside fabric.
The first thing you need to do is to mark the pattern on the fabric, on a paper trace the rectangle with the help of a pencil and round the corners, cut out the pattern from the paper, lay the pattern on the fabric and trace it with a pencil.
Take the pieces of fabric for the inside of the sewing kit case and lay over it the pieces of batting fabric, mark the middle on this piece and sew on. (don’t press)

6. Make the quilting sandwich.
To make the travel kit case quilted, you need to make the sandwich by laying the main fabric on the bottom (right side down) lay over it the batting fabric and lay over it the fabric where you sew on the batting fabric for the needles. Pinch a few pins.
Take the pieces of the two pockets and lay it on at the other end of the piece. Pinch two pins.

7. Sew on the bias.
Sew on the bias with the sewing machine following the mark of the pencil. With the help of a pair of scissor trim the fabric and the batting fabric. Leave 1/4 for the seam.

8. Sew to finish the bias.
Turn the piece to see the main side and turn the bias and fold it twice, pinch a few pins.

9. Fix the bias.
Take your time to do this step and pinch as many pins as you need to get the bias on its place.

10. Sew to finish the bias
Sew on your sewing machine.
You can do this step with a regular stitch on your sewing machine or you can use a decorative stitch on your sewing machine as I did.
On this photo below, you can see how the inner side of the sewing kit looks like with the decorative stitch on the bias.

11. Sew a snap fastener and a button
Sew a snap fastener on each end of the travel sewing kit and sew a button on the front side to add some decoration on it.

 Your travel sewing kit is finished, you can keep a small folded pair of scissors with round point, a couple of needles and a few pins and safety pins, the pockets are the right side to take with you a couple of embroidery floss pieces, a rubber thimble will fit perfect in the pockets.
Find more easy sewing tutorials to make today here!
All make by you and easy to carry on any bag, it will help you to keep working on your sewing or embroidery project anywhere you go!
Are you looking for a sewing machine for beginners, this is the one I have at home!
Enjoyed this sewing tutorial? Give a share my PIN, thank you!

